Apple Enchiladas

This household enjoys a good dessert. We also favor anything wrapped up in a tortilla. Enter in to our world Apple Enchiladas. Apple pie filling, wrapped in flour tortillas and covered in a super easy caramel sauce.

Apple enchiladas are a super easy, sweet treat. All they take is a few minutes of prep work before a quick bake in the oven. They are delicious. Like I’m talking life changing. 


Apple Enchiladas 

  • 2 cans of apple pie filling
  • 8-12 flour tortillas (depending on size)

Warm tortillas in the microwave so they are easily pliable. In ours it was a quick 30 second spin. Times will vary. 

Fill tortillas with apple pie filling. Be careful not to overfill so it can still be rolled. I like to tuck my ends in then roll the tortilla. Making a neat little packet. Arrange in a greased 9×13 pan. 

Caramel Sauce:

  • 1 stick (1/2 cup) unsalted butter
  • 1/2 cup light brown sugar
  • 1/2 cup granulated sugar 
  • 1/2 cup water
  • Cinnamon to taste (I use around 2 teaspoons)

Combine all sauce ingredients in a medium sized sauce pan. Bring to a boil. Boil until mixture begins to slightly thicken (1-2 minutes). Immediately pour over prepared apple enchiladas. 

Ok, now if you have self control, they are best if you allow them to sit for an hour. This allows the tortillas to soak in the carmel-ly goodness. That being said I have no self control. I pop them in the oven immediately the vast majority of the time… 

Bake in a 350 degree oven for 25 minutes. The tops of the tortillas will begin to lightly brown. 

I like to serve these with vanilla ice cream or whipped cream. Both equally as delicious! And a tasty side note: these are even better the next morning after sitting in the fridge overnight. Not that I would recommend dessert for breakfast or anything….

No Drip Popsicles

My kids, like any other kids, LOVE Popsicles! Most days they can manage to eat them like civil little people. Other days not so much. And let’s face it, that little one although cute, is a walking mess. The tribe has also been politely reminding me that they want to make homemade Popsicles.

I walked in to WalMart the other day and lo and behold, Popsicle molds were on sale for 88 cents. So I grabbed a few. Then a quick search yielded this quick, simple and fairly mess free recipe.

  
Drip Free Popsicles 

  1. 1 3 ounce package of jello
  2. 1/3 cup of sugar
  3. 2 cups boiling water 
  4. 2 cups cold water

In a large bowl whisk together jello powder, sugar and boiling water. Stir until well combined. This may take several minutes. Add cold water. Pour in to molds and place in freezer. Let freeze 6 hours or overnight. When ready to eat run warm water over the molds to loosen. 

As the Popsicles get warmer they become more of the consistency of warm jello. Not leaving little drips all over. 

Orange Pineapple Dessert

Since June is dairy month here is a dairy filled recipe! This is plan for all recipes this month to include lots of dairy deliciousness for you to enjoy!

We devour this at pretty much all family gatherings once spring hits. It’s also one of my husbands favorite desserts. As in he hides the leftovers and eats them in the middle of the night. This recipe originated from a family friend and if I remember correctly it may have really originated as a TOPS dessert. The original recipe is made of all light and sugar free products, so it will work splendidly if you want to make this a “lite” dessert. We generally do a *cough, cough* regular version. My family refers to this as “Orange Fluff”.

This recipe was included in a cook book my mom made for me when Tom and I were married.

This recipe was included in a cook book my mom made for me when Tom and I were married.

Orange Pineapple Dessert (Orange Fluff)

  • 1- 8 ounce Container of Cool Whip
  • 1- 20 ounce Can of Crushed Pineapple, not drained
  • 1 Can of Mandarin Oranges
  • 8 ounces of Sour Cream (can be fat free or reduced fat)
  • 1 Large Box of Instant Vanilla Pudding (sugar free/fat free if you wish)

Mix the dry pudding in to the can crushed pineapple. Add the sour cream and oranges. Stir well. Gently fold in the cool whip.

That’s it. Talk about easy! Now the recipe says you should refrigerate it for an hour after mixing it up. If you can wait that long I commend you. It normally doesn’t happen at this place!


Pig Lickin’ Good Cake

Yes, that is seriously the name of this cake. It is seriously that good. This recipe originally came out of a cookbook my church made 10 or so years ago. I was looking for a cake recipe to take to a cook out at my parents tonight and stumbled back upon it. It’s been a few years since I made it, so after re-finding the recipe I knew it was what I had to make. It’s moist, delicious and contains fruit so it’s almost healthy!

Pig Lickin’ Good Cake

Cake:

  • 1 Lemon Cake Mix
  • 4 eggs
  • 1/2C Vegetable or Canola Oil
  • 1- 11oz Can of Mandarin Oranges

Put all ingredients in to a mixer bowl. Mix on medium for 2 minutes. Bake in a greased 9×13 pan at 350 degrees for a half hour. Let the cake completely cool.

Topping:

  • 2- 8oz Cartons of Cool Whip
  • 1 Can of Crushed Pineapple, drained
  • 1 Large Box of Vanilla Instant Pudding

Place all ingredients in a bowl and fold together. Spread over the top of the cake when combined. This cake needs to be refrigerated after the topping has been put on it.

Image

Completed pan-o-yummy cake!

If there’s a recipe I’ve blogged that MUST be tried it’s this one.  I would make this cake the night before if possible, it seems to make it even tastier. And remember it has fruit in it so you can have 2 slices and still be good!

Country Fair Blog Part

Banana Bread

My bananas, a little past their prime.

My bananas, a little past their prime.

I have this bunch of delightfully brown bananas. It has been raining and ugly here all morning. This is really becoming quite the trend. I’m reading all these tweets on Twitter and posts on Facebook about all these lucky ducks who are done planting. They obviously don’t live too close to us, if they did they would have needed to strap flotation devices to their tractors to even think about getting in to some of the fields here. Mud is abundant right now, growing crops are not.

Back to my bananas and off my wet, slippery soap box. I have decided to use this wet, nasty morning to bake. I have the day off so I’m going to spend it baking. Yes, I could be much more productive than whipping some brown bananas in to a loaf of scrumptious bread, but I digress. Bananas either go like hot cakes around this house or they sit on the counter until they are only fit for the chickens to eat. I caught them in the nick of time today. Banana bread they shall become!

Banana Bread

Preheat oven to 350 degrees.

  • 2/3C of Sugar
  • 1/3C of Shortening
  • 3 TBSP Buttermilk or Soured Milk*
  • 1C Mashed Bananas
  • 2C Flour
  • 1 TSP Baking Powder
  • 1/2 TSP Baking Soda
  • 2 Eggs
  • 1/2 TSP Salt
  • 1/2 C Chopped Nuts, Optional

* If you don’t have buttermilk, create “sour milk” by mixing 2 1/2 TBSP milk with 1/2TBSP lemon juice. Let it sit a few minutes until it’s curdled.

Cream the sugar, shortening and eggs in a mixer. Stir in the milk and bananas. Sift together the dry ingredients and slowly add to the mixture. Mix in the chopped nuts. Pour in to a greased 9x5x3 loaf pan. Let stand for 20 minutes. Then bake at 350 degrees for 50-60 minutes or until a toothpick inserted in to the middle comes out clean.

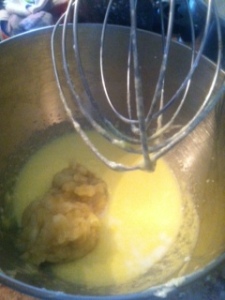
Creaming the shortening, sugar and eggs. Nice motion photography!

Creaming the shortening, sugar and eggs. Nice motion photography!

Add in the bananas and milk. If you have a tribe of your own, they make excellent banana mashers!

Add in the bananas and milk. If you have a tribe of your own, they make excellent banana mashers!

So upon uploading this amazing photography work of mine I realized you can see all of my clean, mismatched socks in the top left corner. Our washer and dryer are in the kitchen. Word from the wise, do NOT ever do this in a house. 3 kids, a farm, my kitchen is constantly full of laundry.

Here come the dry ingredients!

Here come the dry ingredients!

All mixed up!

All mixed up!

bananabreadrest

In a well greased loaf pan. Now we rest for 20 minutes.

Now you get to find something to do for the next 20 minutes while this loaf of deliciousness rests. Me, I’m going to go fold those socks.

Once rested pop it in the oven and wait again……


All done!!!!

All done!!!!

These loaves normally don’t last long around our house. Make sure to have a stick of softened butter to slather on the warm bread. This is quite the treat, all you have to do is recycle some bananas!